- Code: Select all
//Map Functions
void setMapSize(int minX, int minY, int maxX, int maxY) //Set the limits of the view's X and Y
{
    view.x=min(view.width*maxX, max(view.x, view.width*minX)); //limit X based on screens(note 1)
    view.y=min(view.height*maxY, max(view.y, view.height*minY)); //limit Y based on screens(note 1)
}
void setMap(int mapnum, int startx, int starty) //Set the map index, to tell what map you are on
{
    map=mapnum; //Set the map
    x=startx; //start X (exact X and Y)
    y=starty; //Start y (Exact X and Y)
}
How to use:
Create a switch to determine what map your on, now it's as simple as limiting the view using this code
- Code: Select all
setMapSize(minX, minY, maxX, maxY);
minX is how many screens the view can reach torwards the left (starting with 0, by default the views X and Y is 0 in the demo)
maxX is how many screens it can go to the right (Again, starting from 0).
same with miny and maxy, but minY is how much the screen to go UP, (In the demos case, -1 because it can only go up 1 screen, and the - represents up, unless your map is more complex and starts at 5, then if you wanted it to go up only 1 screen, you'd say 4 instead of -1 because your Y is already 5, and 5-1 is 4
Here's an example:
- Code: Select all
switch(map)
{
    case 0:
    setMapSize(0, -1, 5, 0);
    break;
    case 1:
    setMapSize(6, 0, 10, 0);
    break;
    case 2:
    setMapSize(11, -2, 11, 0);
    break;
    case 3:
    setMapSize(12, 0, 12, 0);
    break;
}
Demo:
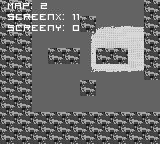
Screenshot:
Enlarged for thumbnail and/or viewing:


